These elements are all useful down the line, and doing all the setup at once avoids later issues.
## 2 - Configure the environment Open your beautiful terminal emulator that you installed - we'll run a few commands in it to set it up. #### SF CLI Run the following command to update the sf cli. This is necessary because some installation sources won't have the latest version. `sf update`You should see `@salesforce/cli: Updating CLI` run for a bit.If you see an error saying `sf` is not a command or program, something went wrong during the installation in step 1. Contact your IT (or check the installation page of the CLI if you're Admin or not in an enterprise context).
Once that's done, run the following command to install the plugins we mentioned earlier - sfdmu, sgd, and code analyzer `echo y | sf plugins install sfdmu sfdx-git-delta code-analyzer`Because sgd is not signed, you will get a warning saying that "This plugin is not digitally signed and its authenticity cannot be verified". This is expected, and you will have to answer `y` (yes) to proceed with the installation.
#### GIT Once you've done that, run the following commands to configure git: `git config --global user.name "FirstName LastName"` replacing Firstname and Lastname with your own. `git config --global user.email "email@server.tld"` replacing the email with yours. **If you're running Windows** - git config --global core.autocrlf true, followed by git config --global core.longpaths true - these allow git to properly handle line returns and long path names, which we have a lot of. For authentication, you should be using gcm by default, but just in case your installation got broken, run git config --global credential.helper manager to allow git to store logins. **If you're running Mac or Linux** - git config --global core.autocrlf input and then go to the [GCM Releases page](https://github.com/git-ecosystem/git-credential-manager/releases), find the .pkg file, and install it.All of this setup has to be done once, and you will probably never touch it again.
Finally, run `java --version `If you don't see an error, and you see something like `openjdk 21.0.3 2024-04-16 LT` then you installed Zulu properly and you're fine.
## 3 - Link Git to Bitbucket Before proceeding, verify that Git is properly configured: ```bash # Verify Git configuration git config --global user.name git config --global user.email git config --global credential.helper ``` ##### Create Atlassian API Token - **Navigate to Atlassian Account Security** - Go to [https://id.atlassian.com/manage-profile/security/api-tokens](https://id.atlassian.com/manage-profile/security/api-tokens) - Log in with your Atlassian account credentials - **Create New API Token** - Click **"Create API token with scopes"** - Enter a descriptive label: `Git Access - [Your Machine Name]` - Click **"Create"** **[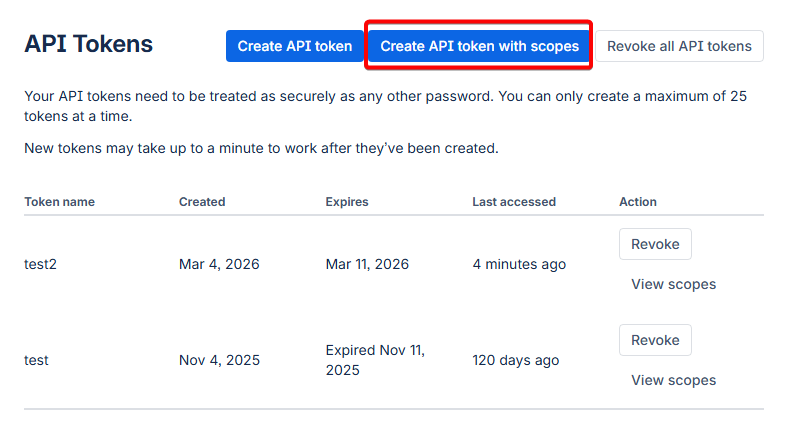](https://wiki.sfxd.org/uploads/images/gallery/2026-03/image.png)** - **Configure Token Scopes** - In the search bar, type `repository` and select all repository-related scopes: - `Repositories: Read` - `Repositories: Write` - `Repositories: Admin` (if you need admin access) - In the search bar, type `pull requests` and select: - `Pull requests: Read` - `Pull requests: Write` - **Copy and Secure Token** - **Important**: Copy the token immediately - you won't be able to see it again - Store it securely (password manager recommended)Treat this API token like a password. Anyone with this token can access your Bitbucket repositories with the permissions you've granted.
##### Clone Repository and Authenticate 1. **Navigate to Your Project Repository** - Go to your Bitbucket workspace: `https://bitbucket.org/your-workspace` - Find your project repository - Click the **"Clone"** button - Copy the HTTPS clone URL [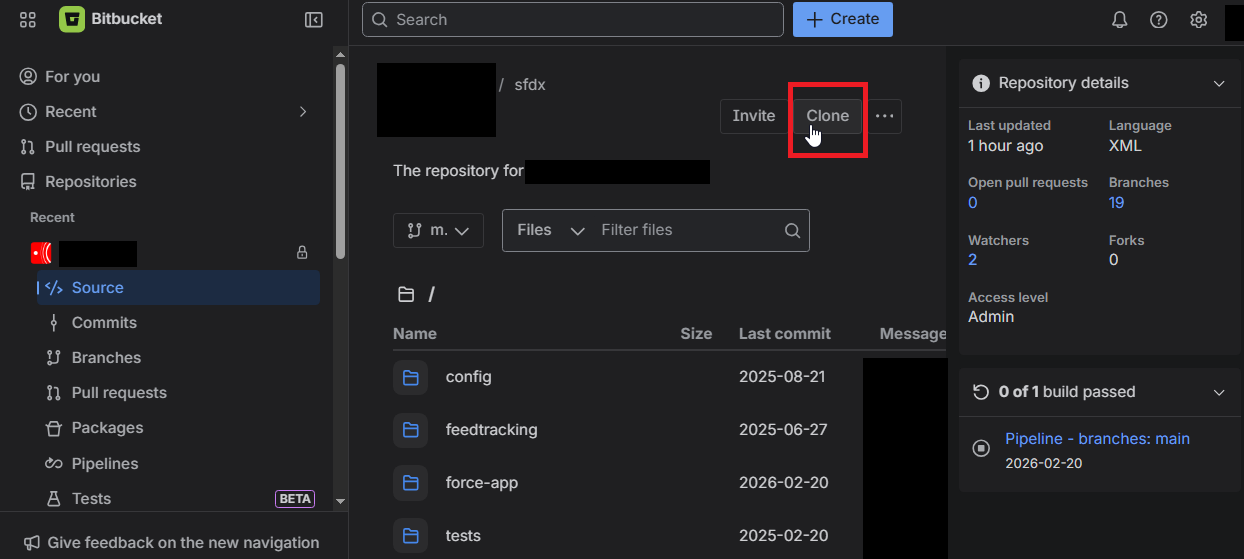](https://wiki.sfxd.org/uploads/images/gallery/2026-03/wjGimage.png) 2. **Clone Repository Locally**```bash # Navigate to your projects directory cd /path/to/your/projects # Clone the repository git clone https://bitbucket.org/workspace/repo-name.git cd repo-name ``` 3. **Authentication Process** When prompted for credentials: - If prompted to choose between "web" and "password/token", select **"token"** - Paste the token - the bitbucket username should be prefilled from the git clone URL 4. **Verify Authentication**``` git fetch origin ```If the command completes without asking for credentials again, your authentication is properly configured and stored in Git Credential Manager (GCM).
## 4 - Configure VSCode Open up VSCode. Go to the Extensions in the side panel (it looks like three squares) [](https://wiki.sfxd.org/uploads/images/gallery/2024-07/image-1720101159401.png) and search for "Salesforce", then install - Salesforce Extensions Pack - Salesforce Extensions Pack (Expanded) - Salesforce Package.xml Generator for VS Code - Salesforce CLI Command Builder - Salesforce XML Formatter Then search for Atlassian and install "Jira and Bitbucket (Atlassian Labs)". Finally, search for and install "GitLens - Git supercharged". Then go to **Preferences > Settings > Salesforcedx-vscode-core: Detect Conflicts At Sync** and check this checkbox. Once all this is done, I recommend you go to the side panel, click on Source Control, and drag-and-drop both the Commit element and the topmost element to the right of the editor.All this setup allows you to have more visual functions and shortcuts. If you fail to install some elements, it cannot be guaranteed that you will have all the elements you are supposed to.
This concludes basic machine setup. All of this should not have to be done again on an already configured machine.